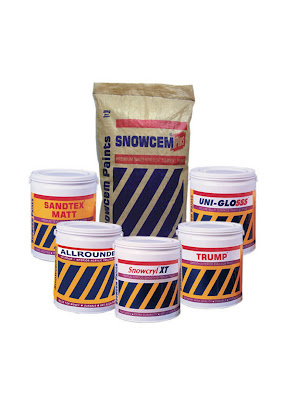
Showing posts with label paints. Show all posts
Showing posts with label paints. Show all posts
Saturday, March 14, 2009


Friday, March 13, 2009
Color cool out

Blues, greens, violets and their intermediates are considered cool colors because of their references to pastoral landscapes and ocean vistas. When we look at these colors they elicit feelings of peace, tranquility and relaxation.
Blue
Soothing blue is an ideal bedroom color choice for adults and children. But that same blue that lulls us to sleep also suppresses our appetites, possibly because there are very few naturally blue foods. Put blue to bed, but try and keep it out of the dining room.
Green
As the dominant color in nature, we are at home with green anywhere in the house. Light greens work well in baths and living rooms; mid-range greens are a great accent for kitchens and dining rooms. The calming effect of green makes it popular in hospitals, schools and work environments.
Violet
Despite the favorable response violet elicits in children, many adults dislike purples, with rosier shades of violet being somewhat more appealing. Children's bedrooms and play areas may be good places to experiment with this color family.
Friday, March 6, 2009
India's light bulb phase out: setting a smart example
How many light bulbs can 1 billion people change? About 400 million wasteful incandescent bulbs, in
Today,
It's truly amazing how big the savings can be from strong action on energy efficiency. With this decision,
In this case,
The funding comes via the cleaner development mechanism (CDM), effectively a way for developed nations to fund emissions reductions in developing nations. This programme sets an example of how nations can work together now to cut emissions, but a much bigger deal is needed urgently to stop runaway climate change.
Industrialised countries must agree to fund around USD 140 billion a year to help economies in the developing world cut emissions, protect tropical forests and adapt to the effects of climate change. Of course, countries too must implement tough domestic targets to ensure that global greenhouse gas emissions reach a peak by 2015, and start declining rapidly thereafter, reaching zero by 2050.
In
Energy efficiency is a really smart way to reduce demand and reduce CO2 emissions quickly, but it is only one half of the solution to climate change. The other is to quit coal and to replace it with non-polluting renewable energy sources like wind and solar - a real energy revolution.
Saturday, February 21, 2009
Sir JJ Architecture students design Pedestrian Ways for the City


Since 2006, the faculty of Sir JJ College of Architecture and Snowcem Paints have collaborated to improve the civic life in the city of
Paints are associated with the faculty medal for the last three years and have kindly sponsored the medals and prizes. The theme given each year are intended to address pressing urban, social and civic issues faced by the city of
The theme for the third Snowcem Faculty Medal Competition (2008) was:
Pedestrian Ways in the City
The aim of the competition is to search for solutions that return the city to its primary users, people on the street, by creating of inclusive and barrier-free urban environment that can be rich and fulfilling.
Pedestrian Ways should make opposite parts of the city accessible, overcome barriers of fast moving traffic by pedestrian walkways and peoples places and create urban environment that's rich with the creations by its own inhabitants.
The meeting of Jury for the Snowcem Faculty Medal 2008 took place in the college premises on 22nd December 2008. The Jury members for the Snowcem Faculty Medal 2008 were Jal Aria, Architect and Academician, Nayana Kathpalia, Convener Cityspace and S. Shankar Menon, former bureaucrat and pedestrian activist. From over 180 design sited all over Mumbai, 30 were short-listed.
After intense deliberations, the Jury awarded the Snowcem Faculty Medal for the Year 2008 to Darshan Maru. The Jury appreciated his design for giving primacy to pedestrians, being simple, doable and cost-effective. The design solution was sensitive to its surroundings and did not disrupt the existing visual landscape. The Jury also appreciated Maru's use of public art in creating a humane environment for the pedestrians.
The Second Prize was awarded to Shraddha Sawant, whose design was appreciated for creating a new public space while finding a solution to the existing traffic problem. The judicious use of levels in the design made both vehicles and pedestrians negotiate easily. The public-private partnership was obvious in the design.
Two Commendations were given by the Jury. The first to Sachin Porkute whose design the jury felt was an interesting response to a complex junction. They appreciated that the design did not disturb the surrounding heritage structures and their current views. The use of travellators for senior citizens was innovative.
The second Commendation was given to Pooja Ugrani. The Jury appreciated the design's primacy for the pedestrian, as it proposed for vehicles (as large as buses) to go underground. The use of the ground plane for cultural activities was lauded.
The Snowcem Faculty medal is to be awarded on 17th February 2008 at 2.00 pm in the C. M. Master Hall of the Sir JJ College of Architecture. Col A.K Pahel, Additional Chief Engineer, of the Mumbai Metropolitan Region Development Authority has kindly consented to grace the occasion and give away the prizes.
Saturday, January 31, 2009
Picking house paint colors

Picking house paint colors isn't just difficult. It's terrifying! Pick colors that are blah, and your house will seem flat and featureless. But if the colors you pick are too bold, they might overwhelm the architecture... and upset the neighbors.
The best colors will highlight the most beautiful features of your home. Skillful use of color can even disguise design flaws, boosting the curb appeal and market value of your home. How do you find that magic color combination? Follow these tips.
1. Honor History
If you're planning to paint an older home, you'll probably want to use a historically accurate color scheme. You can hire a pro to analyze old paint chips and recreate the original color. Or, you can refer to historic color charts and select shades that might have been used at the time your home was built.
2. Jazz Up the Past
In some neighborhoods, homeowners fly in the face of history. Instead of choosing historically accurate colors, they paint their houses modern colors to dramatize architectural details. Using bright colors on old architectural details can produce startling and exciting results. But before you buy 10 gallons of bubblegum pink, it's a good idea to look at what your neighbors are doing. A fluorescent colored Victorian that looks splendid in
3. Consider Your Neighbors
The house next door can give you paint color ideas, but don't copy your neighbor exactly. Choose colors that set your house apart, without clashing with nearby buildings.
4. Borrow From Nature
The landscape around your house is blooming with color ideas. Trees may suggest an earthy palette of greens and browns. A beach setting might suggest vivid blues, turquoises, and coral colors. Even the garden in your front yard can inspire exciting color combinations.
5. Check the Roof
Your house is your canvas, but it is not blank. Some colors are already established. What color is your roof? Your paint color doesn't need to match the roof, but it should harmonize.
6. Look For Things That Won't Be Painted
Every home has some features that will not be painted. Does your house have brick walls? Vinyl windows? A natural wooden door? Will steps and railings remain their existing colors? Choose a color scheme that harmonizes with colors already present on your house.
7. Find Inspiration in Your Living Room
It may seem comical to paint entire house based on the pattern of a pillow case, but this approach does make sense. The color of your furnishings will guide you in the selection of your interior paint colors, and your interior paint colors will influence the colors you use outside. Once again, your goal is to harmonize.
8. Focus on Details
Depending on the size and complexity of your home, you may want to choose two, three, or as many as six colors. In addition to color for your siding, select accent colors for shutters, moldings, doors, window sashes, brackets, columns, and porch decks. But beware: too many colors will overwhelm your house. Too few can make your house seem flat and uninteresting.
9. Use Light to Add Size
It's no wonder large, grand estates are often painted white. Light colors make a building look larger, and white is the favored color for traditional classical architecture. You can add to your home's sense of size and dignity by using white or a pale cream color.
10. Go Dark For Drama
Dark siding or dark bands of trim will make your house seem smaller, but will draw more attention to details. Darker shades are best for accenting recesses, while lighter tones will highlight details that project from the wall surface. On traditional Victorian homes, the darkest paint is often used for the window sashes.
11. Discover Color Families
Contrasting colors will draw attention to architectural details. But, extreme contrasts will clash and actually detract from details. To be safe, consider staying within a single color family. For some accents, try using a darker or lighter shade instead of a different color.
A burst of a single color on just one part of your home may give it a lopsided appearance. Strive to balance colors over the entire building.
(via About.com)
Tuesday, January 20, 2009
Diffrent type of additives in paint

Below is a list of additives used in the manufacture of latex paints, and a description of how they affect the properties of those paints.
1. Thickeners and Rheology Modifiers
(rheology is the science of how a liquid tends to flow)
• provide adequate viscosity (thickness), so the paint may be applied properly
• impact how thick the paint goes on and how well it flows out when applied
• modern rheology modifiers help latex paints
- resist spattering when applied by roller
- flow out smoothly
- be less likely to spoil than with older generation thickeners
(with spoilage, the paint may smell putrid and/or lose viscosity)
2. Surfactants (specialized soaps)
• stabilize the paint so that it will not separate or become too thick to use
• keep pigments dispersed for maximum gloss and hiding
• help "wet" the surface being painted, so the paint won't "crawl" (move about)
when it is applied
• provide compatibility with tinting colorants so that the correct color will be obtained
and help assure that it won't change before the paint is used
3. Biocides: two types are used in latex paints
1. a preservative to keep bacteria from growing in the paint
(This is especially important for paint stored in containers that are repeatedly opened and closed, because contamination can occur.)
2. a mildewcide, to discourage mildew from growing on the surface of the paint after it has been applied.
(This is used mainly in exterior products, although some interior paints, such as those formulated for use in damp areas, e.g., kitchens and baths, may also contain mildewcide.)
4. Defoamers break bubbles as they are formed in the paint when:
- the paint is mixed in the factory
- it is put on the shaker or stirred
- it is applied to the surface (especially important when rolling the paint on)
5. Co-solvents are additional liquids other than water; that:
- aid the binder in forming a good film when applied down to the minimum recommended application temperature
- help the liquid paint resist damage if frozen
- enhance brushing properties, including flow and "open time" (the time the paint can be applied and worked, before it sets up)
The co-solvents are generally volatile organic compounds (VOCs).
Saturday, January 17, 2009
How to mix paint colors
Mixing paint colors produces custom paint colors perfect for any color scheme. AsktheBuilder.com host Tim Carter demonstrates how to blend or mix paint colors to get the perfect color for your job. Blending paint colors really is easy and useful on any paint job.
Tuesday, January 13, 2009
Likeable living rooms

More often used for family relaxation than formal entertainment, today’s living rooms reflect comfortable, stylish spaces. An ideal location to highlight a unique decorating "persona", color choices for living rooms can be as bold or relaxing as the individual preferences of the homeowner.
Decorative Paint Techniques: Techniques that are utilized in
living room spaces demonstrate a homeowner’s preference for
added texture, color and style (see Decorative Techniques).
• Utilizing a "Combing" or "Dragging" technique, for instance on one representative accent wall that is within in a small, square living room area can lend the illusion of added length and space.
• Consider decorative techniques that provide fabric like appearances such as leather, suede and silk to impart an elegant appearance for living rooms that portray a formal air.
• Denim, chambray and chenille fabrications can also be
achieved through the use of decorative paint techniques for the more casually styled living room space.
• Consider adding distinctive flair to the living room space by incorporating color by means of painted picture frames used as decorative accents, painted "faux" fireplaces add ambiance and charm, or contrasting painted moldings and trim within the living room space.
Thursday, January 8, 2009
Paint color trends for 2009
Paint color styles for 2009 draws inspiration from both nature and nurture. Paint Quality Institute has released a short video to demonstrate these exciting design directions, which highlight the 2009 color trends.
Wednesday, December 31, 2008
Desiderata
photo © narkau hom for openphoto.net CC:Attribution-ShareAlike
Desiderata
Go placidly amid the noise and haste, and remember what peace there may be in silence.
As far as possible, without surrender, be on good terms with all persons. Speak your truth quietly and clearly; and listen to others, even to the dull and the ignorant, they too have their story. Avoid loud and aggressive persons, they are vexations to the spirit.
If you compare yourself with others, you may become vain and bitter; for always there will be greater and lesser persons than yourself. Enjoy your achievements as well as your plans. Keep interested in your own career, however humble; it is a real possession in the changing fortunes of time.
Exercise caution in your business affairs, for the world is full of trickery. But let this not blind you to what virtue there is; many persons strive for high ideals, and everywhere life is full of heroism. Be yourself. Especially, do not feign affection. Neither be cynical about love, for in the face of all aridity and disenchantment it is perennial as the grass.
Take kindly to the counsel of the years, gracefully surrendering the things of youth. Nurture strength of spirit to shield you in sudden misfortune. But do not distress yourself with imaginings. Many fears are born of fatigue and loneliness.
Beyond a wholesome discipline, be gentle with yourself. You are a child of the universe, no less than the trees and the stars; you have a right to be here. And whether or not it is clear to you, no doubt the universe is unfolding as it should.
Therefore be at peace with God, whatever you conceive Him to be, and whatever your labors and aspirations, in the noisy confusion of life, keep peace in your soul.
With all its sham, drudgery and broken dreams, it is still a beautiful world.
Be cheerful. Strive to be happy.
~Max Ehrmann c.1920
Tuesday, December 23, 2008
The world's greatest business mind
After an exhaustive search spanning thousands of nominees from five continents, the International Collective Council of Excellence has announced this year’s World’s Greatest Business Mind to universal acclaim and fanfare.
The decision was unanimous despite the fact the world-class shortlist comprised such well-known names as Steve Jobs, Warren Buffett, Bruce Wayne, George Soros, and that kid who invented Facebook. Here's the award video.
The decision was unanimous despite the fact the world-class shortlist comprised such well-known names as Steve Jobs, Warren Buffett, Bruce Wayne, George Soros, and that kid who invented Facebook. Here's the award video.
Friday, December 19, 2008
Walls that talk

Here are some precautions and guidelines to finish the internal surfaces.
For starters, avoid painting your home during the monsoon or when humidity levels are high. Such conditions don't allow paint coats to dry up quickly. Moisture gets trapped between the surface and paint layers causing blistering. Ensure that surfaces to be painted are fully dry. Only for doing whitewashing and applying Snowcem, the surface need not be dry.
If painting the interior walls for the first time, apply simple white wash and leave alone for six months. This action will allow the plaster to dry fully prevent patches and spots later. It will be much better if this six-month period includes a monsoon. After six months, wash the walls fully to remove dirt, dust and flakes, preferably with sand paper so that all the lime wash is scrapped thoroughly. Otherwise, paint will not stick to the walls. Now, apply primers and paint of your choice and the results shall be excellent.
Pidilite has recently launched colour concentrates that produce high tint shades when mixed with white wash. So use these if you don’t want to see white walls in the initial months. Pidilite colors come in liquid form and are double effective than powder colours i.e. instead of 100 gm of powder only 50 gm of liquid concentrate is required. Take care that no ‘neel’ is added to the lime solution if using a colour concentrate. For more, read on:
White washing
Always choose fresh, unslaked, non-hydraulic lime. See that it is of class C category or Dehradun or Narnaul quality. To prepare solution, add water to lime and not lime to water. Add 5 litre water per kg of lime. The final solution should look like thin cream not water. Leave the mixture for at least 24 hours, preferably 48. Use 150 gm lime per sq metre of surface if one coat is to be done. For two coats, let it be 250 gm per sq metre. In a newly constructed house, at least three coats are recommended. However, as you are using whitewash temporarily, two coats are sufficient. Add an adhesive like DDL or SDL to the mixture at a rate of 4 kg per cu m of solution. Fevicol or gum can be the second option if DDL is not available. This will prevent whitewash from sticking to your clothes and body.
The solution: Add some ‘neel’, say 30 gm per 10 kg to the lime solution. It accentuates the whiteness and brings brightness. But the quantity of ‘neel’ must be restricted otherwise walls may give indigo reflection. For application of whitewash, use ‘moonj’ brushes. As a precautionary measure, tie gunny bags to the feet of ladders as their repeated pulling or shifting may leave marks on the floor. See that in each coat the brush passes every point four times — left to right and reverse; up to down and reverse.
Take your pick
For painting internal walls, choice is between distempers and emulsions. If you choose emulsions, there are extra premium acrylic, premium acrylic and acrylic ones to pick from. All acrylic emulsions are durable and give smooth finish to walls. You can choose glossy, semi-glossy or matt finish. Oil bound distempers too are durable, if applied the right way and economical in comparison to emulsions.
Dry distempering: If you are choosing dry distemper for internal walls, see that it is IS 427 marked. Dry distemper comes in powder form and has no resistance to water. It can’t be washed. About 1.5 litre water is added to 2.5 kg distemper. Use lukewarm water instead of cold, allow the solution to stand for at least 30 minutes, stir well and use. It will cost not more than Rs 1.25 per sqft. However, it has a short life. It has been seen that sometimes people do first coat of whitewash and then apply distemper. Don’t. Use a white chalk solution in water as primer to distemper. Dry distemper should give a coverage of about 6 sqm per kg of distemper for two coats. Mix DDL or Fevicol to dry distemper for better adhesion. Golden Champion and Goldy are good brands.
Oil bound distempering: Oil bound distemper (OBD) is washable, doesn’t come off on washing and scores over dry distemper. If you are choosing distemper, prefer OBD. It contains an emulsion of drying oil or varnish that resists water. See that it conforms to IS 428. Use thinned distemper itself as primer to OBD. Four parts of OBD are mixed with one of water to prepare its solution for application. Know that OBD shouldn’t be applied on new plaster for six months at least otherwise all its oils will be soaked by the plaster. However, if you can’t afford to wait, here is a solution. Get some ready mixed alkali resistant paint as per IS 109 and apply a coat of it. Now, you can do OBD after two days only. OBD shouldn’t come off 24 hours after its application. It will cost you around Rs 2 per sqft and give a coverage output of about 6 sqm per litre of paint for two coats. You need not mix DDL to OBD or plastic emulsion as these have a good grip.
Emulsions: If using plastic or acrylic emulsions on internal walls, add water in the first coat only. For quantity of water to be added, follow manufacturer’s guidelines. Choose plastic emulsion of a reputed brand such as Asian, Berger, ICI or Nerolac. IS 5411 mark for these paints stands withdrawn, so don’t look for it. Use manufacturer’s putty to repair the wall if required before application of plastic emulsion. Further, rub the wall with 180 number sand paper on drying up of putty and apply a coat of primer over it. On drying up of primer coat, sand paper with 320 number. Now, apply the final paint and you will receive excellent results. Tell the painter to clean all plastic emulsion drops from the floor immediately as it may become difficult to remove them later. The first coat will dry up in four-five hours. Plastic emulsion paint should give around 8 sqm coverage per litre of paint for two coats.
Tuesday, December 16, 2008
The basics of paint

Paint is one of the most versatile media to work with. But, before you use them in your home, it is essential to get the basics right.
What is paint?
It is a mixture of solid pigments (finely-ground particles) suspended in a liquid medium (water or mineral spirits) that dries to form a protective or decorative coating. Pigments are encapsulated by resins or binders which help attach them to the surface being painted and create the paint film.
All paints fall under two categories: water-based, commonly known as latex paint, and oil-based. The former includes all water-borne paints such as vinyl-acrylic, 100% acrylic and alkyd-modified latex. You can use latex paints both indoors or outdoors. Latex provides an excellent finish and is an easier paint to use. It can be cleaned with soap or water, dries quickly, has milder odours, is non-flammable, and easy to touch up. These environment-friendly paints allow moisture to evaporate through the film thus reducing blistering.
Inexpensive latex paints use softer vinyl-resins (binders) and more water in the formulation. More durable latex paints use 100% acrylic-resins and less water. The term enamel is normally associated with paints that have a glossy finish. These are formulated with higher concentrations of resin as they are used in areas subject to heavy wear and tear. Alkyd paints are more commonly used for areas prone to impact and high wear and tear such as floors or cabinets. These paints take a long time to dry, so they do not show brush strokes as much. But they are more expensive and odour-intensive when drying.
Interior paints can be grouped into two categories:
Distempers: These are traditional economy paints which produce a perfectly satisfactory finish with good workmanship. However, their life cycle is shorter. Dry distempers (which are available in powder form) and oil-bound/synthetic distempers are not washable. Acrylic distempers, being partly based on acrylic resins, give greater smoothness and are washable.
Emulsions: Also known as plastic paints, these are based on a fine dispersion of resin in a solvent, which on drying, creates a remarkably tough, adherent and durable coating. Special additives in emulsions give them an incomparably smooth finish in various shades that last for years. These are resistant to water, chemical, fungus and algae. They come in three categories: silk—premium acrylic emulsions, with silky smoothness and a luxurious silk-like finish; regular—they produce a smooth eggshell finish; and economy—a generation ahead of distempers, they are more durable, washable, fade-resistant and smooth.
Exterior paints
Emulsions are good to be used on the exterior as they contain high acrylic content which gives them a long lifespan. Special additives also make them exceptionally resistant to algae, fungus and atmospheric erosion. Other popular choices are cement paints and textured plasters.
Cement paints come with a weather-resistant coating that is considerably effective. The coating contains special additives that are equipped to deal with the rigours of the external environment. Textured plasters are emulsion-based and provide even stronger protection than silk emulsions, besides unique visual appeal. Their thick surface can be designer-patterned by sponging, stippling or with the help of patterned rollers. They are also washable.
Levels of gloss
The sheen, or gloss, of paint refers to the amount of light reflected by its surface. There are four basic sheens:
• Flat paints exhibit non-reflective properties, providing a matte finish that helps hide surface imperfections. It is normally used for ceilings and walls in areas less prone to wear and tear, such as dining and living rooms.
• Satin finish paints are used to create soft lustre. A satin finish provides a harder surface finish, which is more durable and more stain-resistant than a flat finish.
• Semi-gloss paints are more durable, easier to clean and more stain-resistant than satin-finish paints.
• Gloss paint has a harder, more durable and more stain-resistant finish. It is easier to clean than all other paint finishes.
Monday, December 15, 2008
Unpainted stucco needs more than a wash

Q:My stucco house has never been painted, and from years of never being cleaned it is very dirty. I have had several power-wash companies look at the house. They have tried various chemicals and they do not seem to take this dirt or mold off. None of the companies has washed the house, they have only looked at it and then refused the job.
A: Your house needs more than just a good cleaning. It needs the finish refurbished. We don't doubt that your house has never been painted. But we do question that it never had what is known in the plastering trade as a "color coat."
Stucco is a porous material made of water, lime and cement. If left unsealed, over many years it will become stained. That is the condition we think you face now.
Your question brings back memories from our youth. We've written before that our dad was a master plasterer. He could do anything with the mud, from the finest ornate ceiling work in San Francisco to coating a tract home in Newark. After working Monday through Friday on his real job, he and his buddy, Babe Mesquite, would take on "little jobs" on Saturdays to earn a few extra bucks. Many of these side jobs would be to redo the color coat on tract homes in San Leandro or San Lorenzo.
As we see it, you've got two choices to spruce up your home: a new color coat or paint.
Plastering should be left to the pros. Contact two or three licensed, bonded and insured plastering contractors for quotes.
Painting you can do yourself. The first step is to clean the surface. The quickest and easiest way is with a pressure washer. The water blasts away dirt (not stains). Pressure washers can be a little tricky to operate. For unpainted stucco adjust the spray pattern to a wide spray. Start on an out-of-the-way part of the building to get the hang of using it. Pull the trigger (there will be quite a kickback) and move the wand over the wall in a consistent side-to-side pattern. An additive designed to kill mildew is available to use with the pressure washer. Use it.
Pressure washers are available at rental centers. Make sure to ask the salesperson for a quick tutorial on operating the machine.
Once the building is washed, let it dry for a few days. Wood trim can take as long as a week to dry, depending on the weather. While the building is drying out, scrape off any residual loose paint. Feather the edges of scraped areas with 120-grit sandpaper. Carry a dust brush with you to brush any sanding dust off the newly washed building.
Next, apply a high-quality, stain-blocking latex or oil-based primer, which is a critical step when working with unpainted stucco. The primer will seal the stucco, preventing the finish coat from being absorbed unevenly and looking splotchy. Add a mildewcide to the paint to protect against the rebirth of fungus that may have been present.
We suggest you buy the paint at a store that caters to the trade. The salespeople will be able to suggest primer that is compatible with the finish you select. They also are a fount of useful information should you ask - and you should.
Allow the primer to cure according to the manufacturer's instructions before applying the finish coat. While the primer is curing, caulk any open joints or cracks in the stucco with a good-quality acrylic caulk. Smooth the caulk with a wet rag. Don't think about leaving the primer unpainted. Primer is designed to act as a base for the finish. If left unpainted for any length of time, it will fail, and all of the preparation done to this point will have to be redone.
The final and most exciting step is the finish coat - "putting on the color." Use a top-of-the-line, 100 percent acrylic house paint in the sheen of your choice - flat, satin, semi-gloss or gloss. The shinier the finish, the more any defects will show. We've always been partial to a satin sheen for its washability and because it hides defects well. Because you are dealing with a previously unpainted surface, the stucco may require two coats of the finish.
Over the years, we've used brushes, rollers and airless sprayers to apply primers and finishes. Our best results have come from using the airless sprayer to apply paint to large surfaces, then going back over the area with a roller or a brush while the paint is still wet. We think that method gives us the best of all worlds. The sprayer gets the material on quickly, and the brush or roller gives a uniform coat that gets into all the nooks and crannies.
Thursday, December 11, 2008
How to make flour paint

Do you remember making paper mache at home or in school? What about homemade piñatas? The process of making flour paint isn’t much different, so grab a bag of flour from the kitchen cupboard and get ready!
You will need:
Natural pigment, like clay pigment
Fine sand, silica, quartz or marble dust
A friend
Paint brushes and buckets, and if you’re feeling especially creative, trowels, squeegees and any other improvised tool you think would leave a nice pattern on your walls.
First:
In a large bowl, mix 2 cups flour with 4 cups water, whisking out any lumps.
Then:
In a large saucepan, boil 3 cups water.
Slowly stir in the mixture from the first step.
Reduce heat and stir until the “sauce” thickens.
Finally:
Remove from heat and slowly stir in 2 or 3 more cups of water.
In a separate bowl, stir together dry fillers/pigments and add to the main flour paste. Add more water if needed, to make a paint-like consistency.
You can loosely mix 2 colors if you want to get a faux effect, but test an area first with a sample batch, to practice. You can also add mica, limestone, marble or chalk for different colors and effects. Make sure the colors you use will work together. Consult a color wheel or designer, or find something you like in a magazine!
The important thing is to have the right consistency of the paint. It should flow smoothly off the brush, but not sag or drip. I often use it while it’s still warm, but it will keep for a week or two if you seal the container tightly.
Flour paint is often too thick for use with a roller, but you can use a roller to spread it over the wall, then even it out with the trowel or brush. There are also special texture rollers that are stiff enough to use with flour paint.
After the first coat, the brush marks may be obvious, but you can smooth these out after it’s started to dry by using a clean, damp brush. Personally, I like the texture. After the second coat, troweling the surface when the paint has half-dried can reveal marble, mica or other colors underneath. You can also spot-sand when fully dry. Again, try a sample area first, and don’t worry; sometimes the best results come from happy accidents! Besides you can always add additional coats, which creates more texture, depth and opportunity to reveal underlying colors. If you’re feeling uncertain, just roll it out smooth and leave it solid. Happy painting!
Tuesday, December 9, 2008
What the best paint to use on baby crib?

I reglued a crib for a friend and she wants to paint it white and asked me what was the best paint to use, so I'm asking for help
You should use what is called Milk Paint. It's non-toxic and is always recommended for toys/cribs that kids might put in their mouths. It actually has a dairy product as one of its ingredients.
Besides, it's beautiful paint because the colors are soft on the eye. Gives a country look. In the 1700s and 1800s, it was used to paint houses. Check out Woodworker.com. They sell it there. Just do a search under "milk paint". You'll see a brand called "J.E.Moser's Old-Fashioned Milk Paint". Get that one.
(via thebabycribsite.com)
Saturday, December 6, 2008
Cement waterproofing paint
 Did you know that cement waterproofing paint can actually be made into many different colors? This makes it very good for those that want to use it on the cement surfaces of their home, but want to maintain the certain color scheme they have chosen.
Now you should know that using cement waterproofing paint is not going to help too much with the actual waterproofing of your home. It will help to keep the surfaces that you apply it to from being damaged, but it will do very little to help keep the moisture and water from actually entering your home. If you try to waterproof just with paint it will end up costing you more than you could imagine and you will be sorely disappointed.
You may think that you do not need to waterproof your foundation and the rest of your home because your area does not get heavy rainfalls or snow storms, but you would be wrong. Even if you live in the dessert there is still moisture in the ground that can effect the foundation of your home. Plus the moisture in the ground can travel in any direction and will get into your home over time if you do not waterproof correctly to keep it from doing so.
You will want to start your waterproofing from the beginning, with the foundation. This is something the contractors should have experience in and should be able to do for you. You will want to ask them before you allow them to pour your foundation or basement. Make sure they give your foundation about a month to reach its' full strength before they begin to backfill it. You will also need external draining tiles around your foundation and at least a few feet of large gravel so that the water will not be encouraged to go directly into your basement or foundation. Instead it will move around your home and avoid making your life miserable.
It is incredibly important that you make sure your home is protected from water damage. Water damage can be very costly and many times your insurance will not cover it. Make sure you use more than just cement waterproofing paint to get your home protected and make sure you do it as soon as possible.
Get the Cement Waterproofing Paint you desire and stop your basement from flooding here" Article Source: http://EzineArticles.com/?expert=Benjamin_Robert_Ehinger |
Wednesday, December 3, 2008
Exterior house painting tips
Exterior house painting tips can make a job go much smoother. AsktheBuilder.com host Tim Carter shares some house painting tips from his years of experience. His pointers will make your house painting job much easier.
Thursday, November 20, 2008
Painting tips

Many choices of painting material are available and the trend is to look for best-looking and durable paintwork, irrespective of the cost involved. However, simply buying the best and most expensive paints doesn't bring the desired results. Certain workmanship points too need to be kept in mind. Renaissance is the idea at the back of the mind when a house owner decides to repaint his house. The old paint needs to be removed and surfaces prepared. And, painting a newly-built house demands equal attention, as the first paintwork lays the foundation for all future works. So, a few guidelines given here and in next six episodes must be followed.
First check
Before doing internal and external finishing work, ensure that all doors and windows have been installed in position, all electrical conduits, their boxes and fixtures embedded in walls and walls finished smooth. There should be no plaster finishing marks along the conduits. All plumbing and sanitary pipeline chases must have been filled and finished. Take some more precautions. Tape all the edges of switchboards and window frames. Put jute bags or waste clothes on the floor to save it from paint droppings. When painting external walls, remove your vehicles from the site and cover the plants and shrubs, if you can't move them. Cover all door and window fittings with polythene and tape to avoid messy blotches.
Colour Magic
Decide the colours you are going to in your home very carefully. Pastel shades of pink, green and blue bring a soothing effect to a room while yellow and red are very attractive and make the room look warm. In
Generally, a colour palette displaying hundreds of colours is available with paint dealers. Check it to choose shades of your choice. The present trend is to use a dark colour on one wall of a room to highlight it and project it as the feature wall while lighter colour is applied on the other walls.
If the walls and floor are light-coloured, a room will look bigger. So, choose light colours if you want your room to look bigger. If the ceiling is low, again choose light colours as these will enhance visibility in the room. If the ceiling is too high, apply a dark colour to it and see the room height decrease instantly. Shining and reflecting wall surfaces will also make the room look bigger. If you run a strip or band of colour all round a room, it will give a compact look.
Light and shade
While deciding the colour scheme, you must see how they look in artificial light. Generally, dark colours look brighter in artificial light while light ones appear suppressed. Shade cards don't give you the exact idea. Choose by visiting a friend's house or showrooms where you could see the colours on a wall. Before buying your total requirement, buy samplers (easily available now in most leading brands). Paint a small area of wall, allow it to dry and then decide. You just cannot go wrong this way.
Sequence it Right
Paint a room in the following sequence: Always paint the ceiling first. That way, any drops trickling on to the walls will not be a problem. Next, do the walls and finally, the doors and windows. The most important part of painting, white washing and colouring your house is to find a really good painter. Take extra pain here -- a good painter can put an end to more than half your worries instantly.
Brand Matters
Always buy good quality paint from a reputed company. Never go for cheap and low quality paint even if the painter suggests so. Look for reputed names. Even if you choose a lower grade -- i.e. first, second or third quality -- let it be of a reputed brand. This will help in getting a well-finished surface. Buy the paint in one lot. Different manufacturing lots may have slight difference in appearance. So, to avoid a variation in shade and to have a uniform look, buying full quantity of paint in one lot is important.
Options Aplenty
A large variety of wall and woodwork paints is available and it is difficult for the house builder to decide which paint to choose for each surface. For internal surfaces, the choice is between whitewash, colourwash, dry distemper, oil bound (oil emulsion) distempers, plastic (acrylic) emulsion paints and premium emulsion paints. For exterior surfaces, choice is between cement paints such as Snowcem Paints red paints, semi acrylic emulsion paints, 100% acrylic emulsion paints, heritage finish, spectrum finish and cladding. For woodwork, choice is between synthetic enamel paint, French polish, polyurethane polish and melamine polish.
Calculation Time
Work out the required quantity of each type of paint to be used by measuring the areas of the walls and the ceiling. Deduct the area of doors, windows, ventilators, openings, cupboards etc from the wall area. Work out the area of ceilings. If you can't work this out, as a thumb rule, multiply your floor area by 5 and this is the approximate total area to be painted. Different type of paints have different covering capacities. Wall emulsions such as acrylic, plastic and lustre cover about 80 to 150 sq ft. area a litre when applied in two coats. Acrylic and oil bound distempers cover 60 to 100 sqft per kg per two coats. Wood enamels cover 80 to 90 sqft per litre per two coats while transparent finishes cover just 40 sq ft per litre per two coats. Exterior acrylic or textured can cover 50 to 75 sq ft area per litre per two coats and cement paints cover about 30 sqft area per litre per two coats. Coverage capacity differs from company to company.
Cost Factor
For least cost of finishing work, the combination of paints is cement paint for external walls, dry or oil bound distemper for internal walls, French polish or synthetic enamel of second quality for woodwork and third quality synthetic emulsion for metals. For best quality work and no cost consideration, use a combination of dirt proof and weather proof 100 per cent acrylic exterior emulsion paint or heritage finish or spectrum finish for external walls, premium emulsion paint for internal walls, melamine or polyurethane finish for woodwork and first quality synthetic enamel for metallic surfaces. For medium cost and quality, use textured exterior emulsion paint or semi acrylic emulsion paint or cladding for external walls, low range plastic emulsion for internal walls, low range melamine or polyurethane polish for woodwork and second quality synthetic enamel for metallic surfaces.
Wednesday, November 19, 2008
Protect, preen, paint

Exteriors of a house are constantly exposed to severely acting elements of weather. In
You have many choices for the exterior surfaces and the elevation. You can have exposed brickwork or plastered surfaces or a combination of both or cladding of walls with various types of stones or textured finish. While choosing exterior finish, our main purpose is to make the elevation look beautiful and appealing, to have a durable finish that survives for a few years, at least, to choose a finish that resists dust and weathering effects and the one that breathes -- allows moisture of walls to escape without hurting their beauty.
All these aspects can be well fulfilled through right choice of finish and proper workmanship. Here are a few guidelines for durable painting of exterior surfaces, but first choose what you want.
Exposed Brick
Many homeowners prefer exposed brickwork on the elevation. Since ages, man has been seeing exposed brickwork in buildings, monuments and forts and an inbuilt desire to have part elevation with it remains. However, the decision to have exposed brick in the elevation should be made early and one should keep sorting out good bricks while doing the brickwork of foundations and internal walls of the house and use these bricks in exposed brickwork for a uniform look. Otherwise, use mechanised bricks. When the exposed brickwork of external walls is in progress, do raking of joints to a depth of 10 mm at least while it is still green. Before applying paint, make sure to do pointing.
Pointing: Prefer deep pointing to flush. Flush pointing doesn’t look good on brickwork and mars its very character. Always begin deep pointing work from top downwards. See that all extra mortar is cleaned off and not smeared over the bricks. Do pointing work with 1:2 cement sand mortar. Take care that the vertical joints are truly at right angles to horizontal lines and any minor errors in brickwork are hidden by the pointing work. A very important point to see is that the vertical lines should not end away from horizontal lines nor should these extend into them creating ridges there. Cure the pointing work well for at least seven days.
Cement Paint
If you choose cement paints, commonly known by the trade name Snowcem, on external surfaces, choose a reputed brand like Super Snowcem by Killick Nixon or the one by Asian Paints. Always choose from a fresh lot and see that the bags are IS 5410 marked. Open a bag, feel the Snowcem in your hand and see that it is free of lumps. In general, cement paint bags or sealed drums showing date of manufacture as within one year of purchase are considered fit but try to get a lot as fresh as possible. Reason for this is that cement paints are just a mixture of cement and pigments and cement attracts moisture from air and loses strength with time. So, don’t go by the expiry date on the bags or drums but get a lot as fresh as possible.
Preparation: While preparing cement paint for exterior walls, take care that dry powder is added to water and not water to powder. First take 50 per cent quantity of water to make a paste and then add balance 50 per cent to make a workable mix. Always mix thoroughly. At one time, mix only a quantity that will get used up within an hour of mixing with water. Otherwise, the paint mixture will start setting, will lose strength and brush marks will appear on surfaces.
The coats method: Clean exterior walls of dirt, dust, loose material and efflorescence with wire brush and then by washing, before applying the first coat of Snowcem. Thoroughly wet the surface before applying paint. Apply second coat after 24 hours of first. However, you need not wet the surface before applying second coat. After second coat, keep the surface fully wet for next two days by spraying water on the paint and not by throwing water with a pipe or container. I recommend a fog spray. It is a tried method and yields best results.
Texture Paint
In case you don’t want to paint the exterior plastered walls with Snowcem, consider Birla White Textura. Textura is also a cement-based paint but gives a textured wall finish — as the name suggests — instead of a plain surface. It comes in a variety of textures and designs. Unlike acrylic paint, no primer coat is required and is an economical textured finish. Above all, Textura needs no curing, has extra adhesive strength and resists water and weather. It is mixed with water and applied with trowel or roller or spray. Roller or spray finish textura is termed as RF while trowel finish textura is called TF.
The method: Prefer to use RF textura on interior surfaces and TF textura on the exterior. Textura contains Birla white cement, some minerals, polymers, quartz sand and additives. You can apply it even on damp walls. Textura TF and RF are sold in 25 kg bags. A bag costs around Rs 700. Generally, a bag cover gives 100 sq ft. area. Though the textura shade card may show many colours, it is applied only in white colour and then paints like Apex are applied over it. Its overall cost, including labour, should be about Rs 16 to 18 a sq ft. While applying, take care that at one time, only that much quantity is prepared that can be used up in 1.5-2 hours. To prepare its solution, add about 45-50 per cent water to it. If you want to use the spray method, some more water may be added to make it sprayable with a gun.
Acrylic Emulsion
Cement paints used for painting external surfaces of walls are not fully resistant to algae and fungus. Other paints available are semi acrylic and 100 per cent acrylic exterior emulsion paints. These paints give extremely good performance and also provide protection against fungus and algae. However, these are many times costlier than Cement paints. Therefore, you must make your cost calculations and buy paints your budget allows. All inclusive cost of semi-acrylic paints is around Rs 6- 8 per sq ft. This includes labour component. Good semi-acrylic paint costs around Rs 100-125 a litre. One litre should cover about 50 sq ft. area in two coats. No water curing of this paint is required.
Cost factor: For really good results, choose a 100 per cent acrylic exterior emulsion paint. It costs around Rs 180-220 a litre and covers around 50 sq ft area in two coats. All-inclusive cost of its application shall be about Rs 10-12 per sq ft. Today, labour component is very high and tends to equal material cost if you engage skilled painters. Do no water curing for this type of paint as well.
More tips on paintwork shall follow. Till then, happy painting!
Subscribe to:
Posts (Atom)